FoxyProxy Integration with Proxies
FoxyProxy allows you to automatically switch between different proxy servers based on URL patterns, websites, and other criteria. It is useful for accessing geo-exclusive content, protecting privacy, and browsing anonymously.

What is FoxyProxy
FoxyProxy is a free and open-source proxy management add-on for Chromium-based browsers like Firefox and Chrome.
FoxyProxy Standard is the original and most popular version. It supports a variety of proxy types, including HTTP, HTTPS, SOCKS, and PAC. Additionally, it has a number of features that make proxy management intuitive. The rule editor, proxy status bar, and proxy log are examples.
While the Standard version remains the cornerstone of the FoxyProxy family, other add-ons offer additional features. FoxyProxy Basic provides a simplified proxy management solution for casual users, while FoxyProxy Plus caters to power users with advanced features like automatic proxy updates.
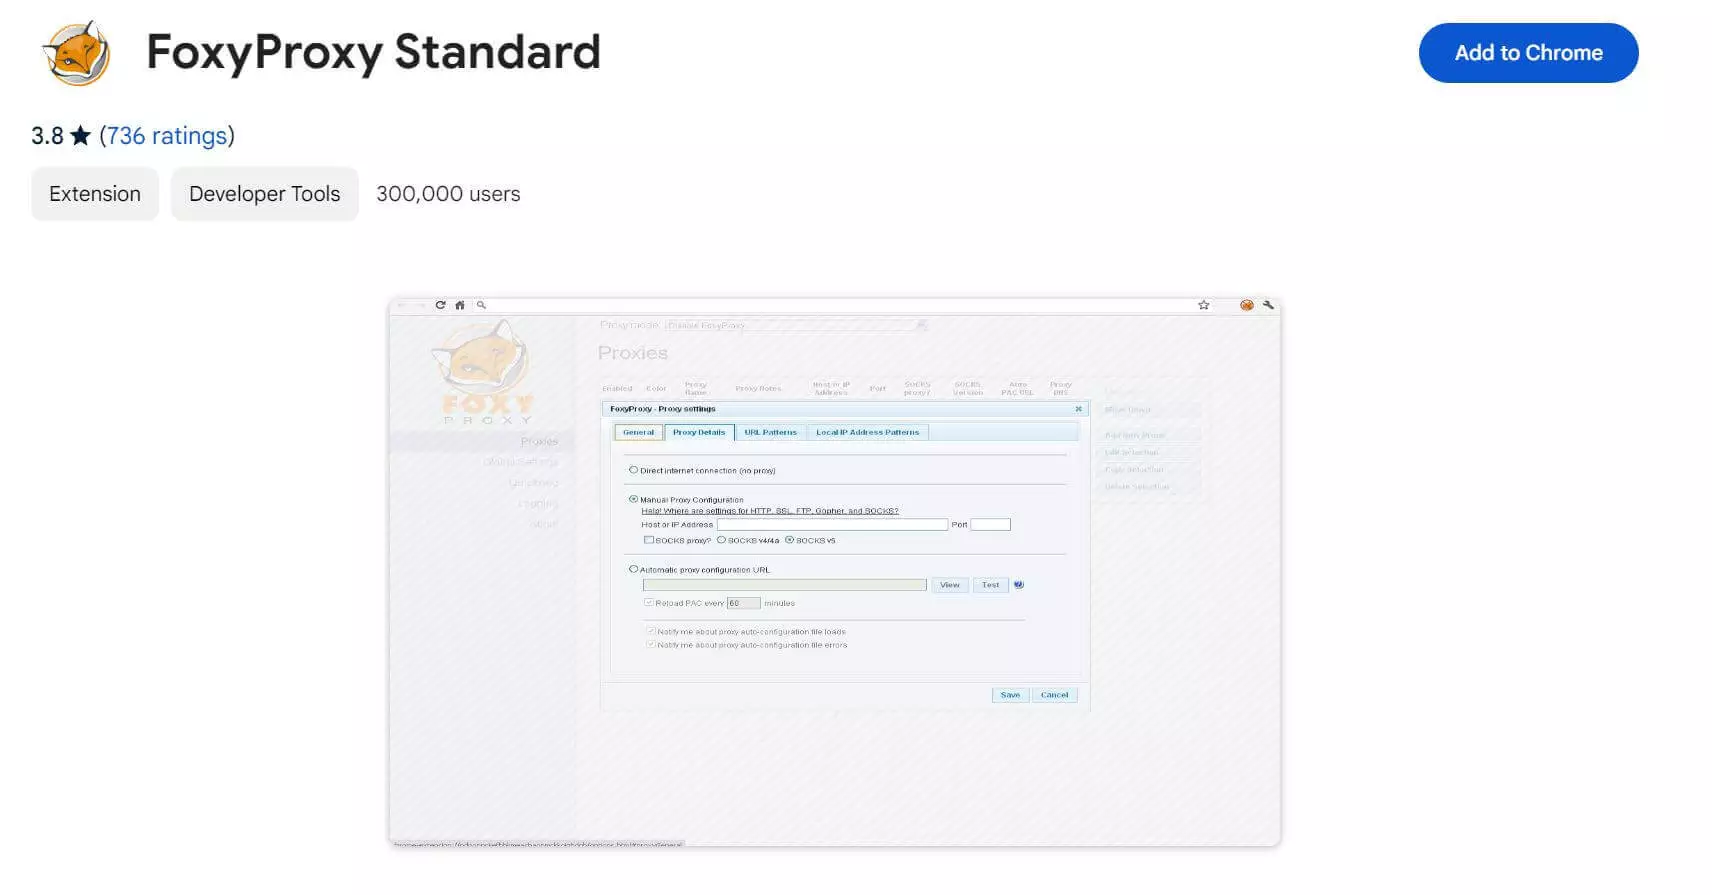
Although NewIPNow proxies are compatible on all versions, this guide will focus on setting up proxies on the Standard extension.
Pre-requisite Steps in Using FoxyProxy
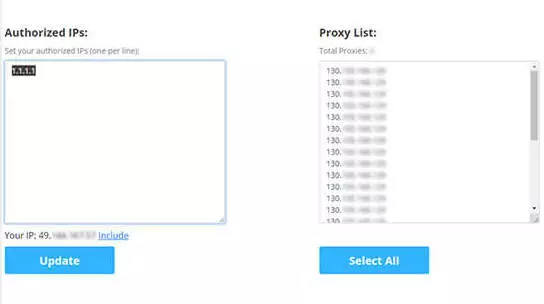
2. Authorize your IP.
NewIPNow requires IP authentication before you can start using your proxies.
This process helps ensure your security and prevent unauthorized users.
How to Set Up FoxyProxy Extension in Google Chrome
1. Open FoxyProxy’s Options and Click on the “Add New Proxy” button.
Click on the FoxyProxy icon in your browser toolbar.
Then, select “Options” from the drop-down menu.
On the right sidebar, you will find the “Add New Proxy” button.

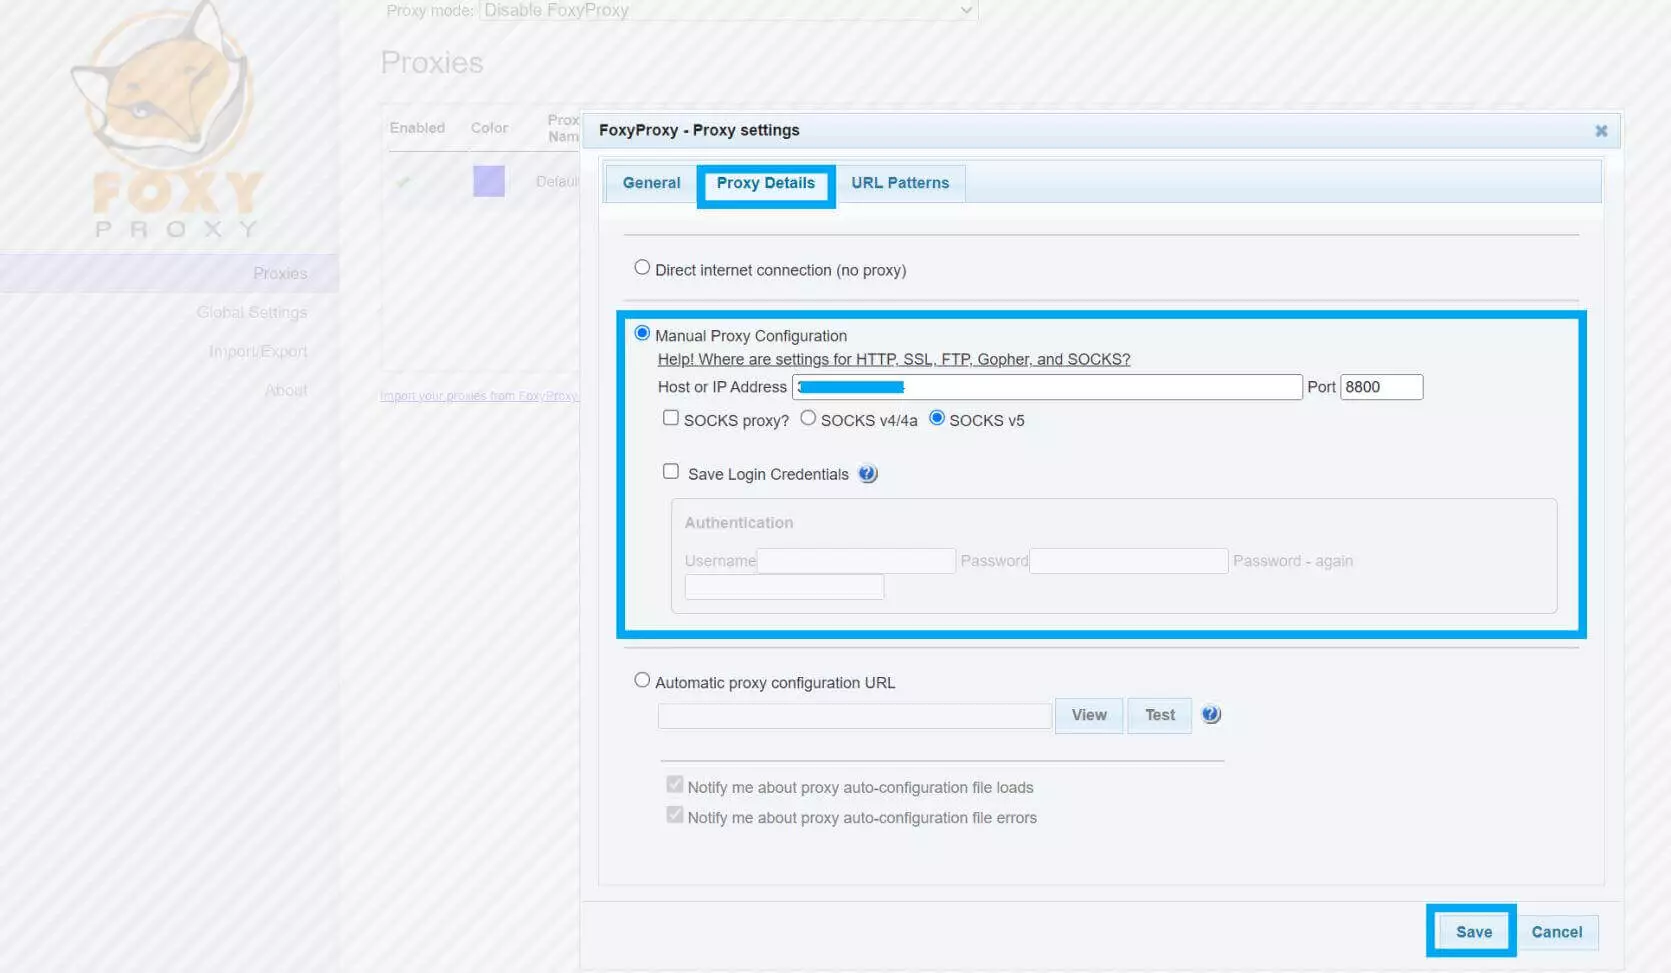
2. Go to the “Proxy Details” tab and select “Manual Proxy Configuration”.
Host or IP Address: Type in your proxy IP. You can find and choose from your NewIPNow Proxy List.
Port: Provide the number beside the proxy IP in your proxy list (example: 8800, 8080).
SOCKS proxy?: Leave this unchecked since NewIPNow provides HTTP proxies.
By default, SOCKS v5 is selected. No changes necessary.
Save Login Credentials: You can leave this section blank. NewIPNow does not require Username and Password. Your proxies are good to use after you authenticate your IP.
Click on the “Save” button once done.
3. Ensure you have “Use proxy…” checked and activated.
Click on the FoxyProxy icon on your browser toolbar.
Check the option that best suits your target. You can “Use proxy for all URLs” or “Use proxies based on their pre-defined patterns and priorities”.
By choosing the latter option, the browser consults FoxyProxy to determine whether a proxy should be employed for loading URLs. Then, FoxyProxy swiftly evaluates the current URL against all configured URL patterns.
Visit an IP checker site to confirm that your proxies work. The site should show your proxy IP and location instead of your actual address.

Optional Proxy Settings
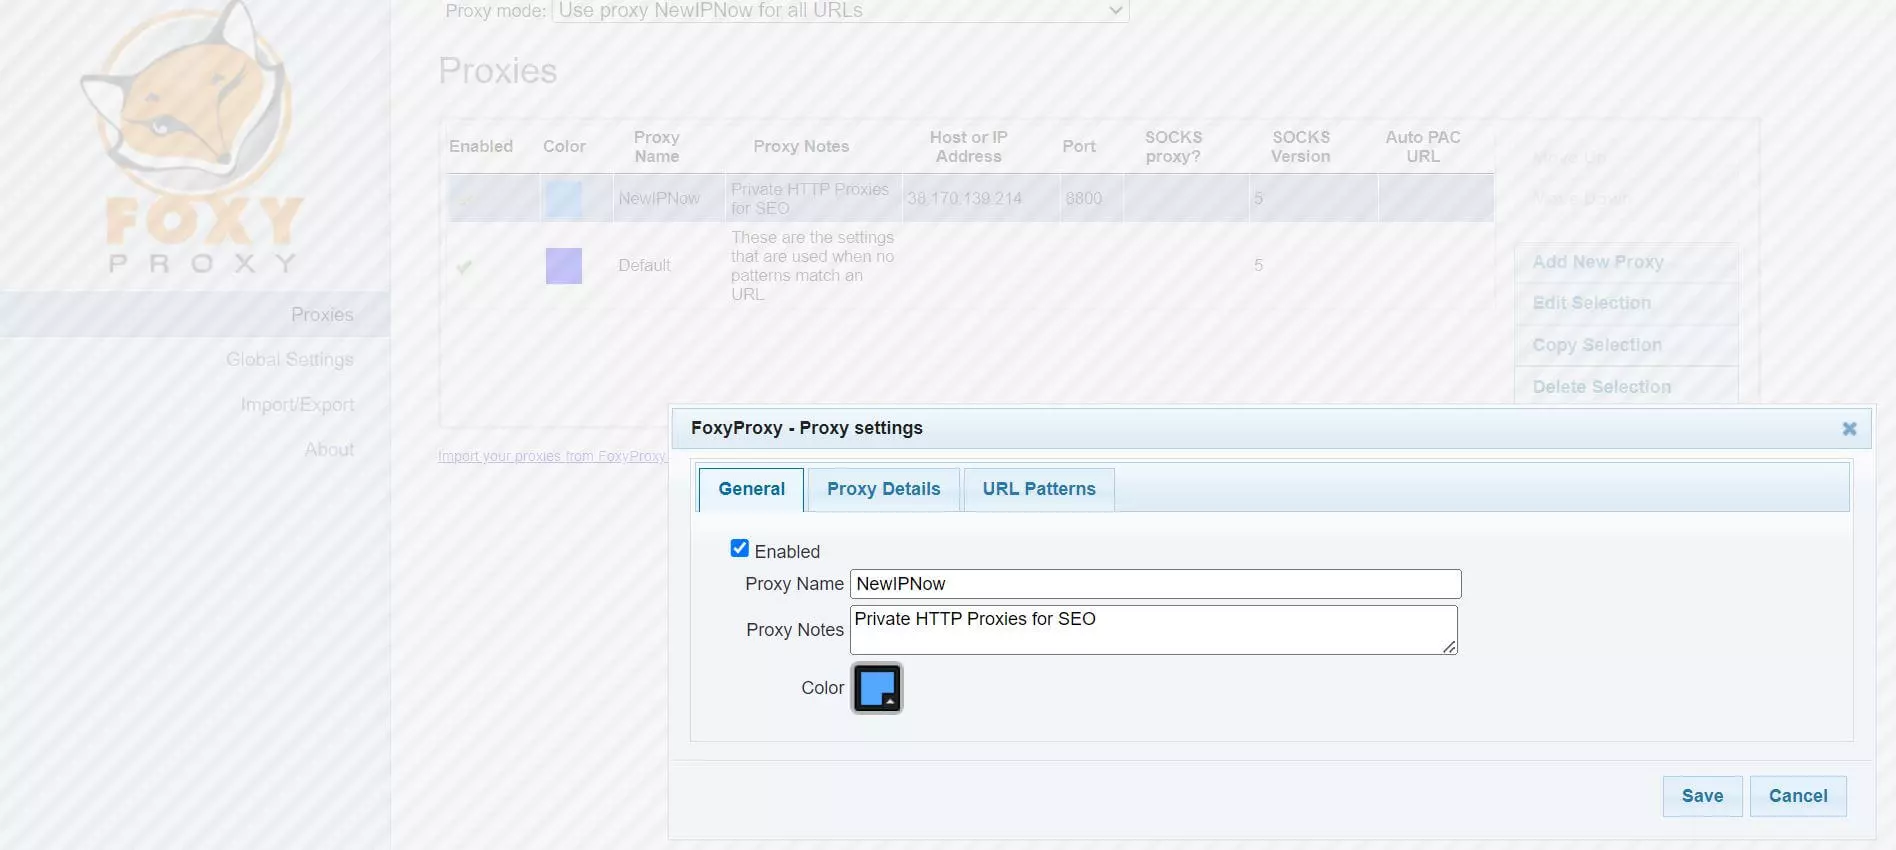
1. Name your Proxy Profile.
Go to the “General” tab.
Type in a descriptive Proxy Name and Proxy Notes.
Choose a color for the profile.
These settings will help you distinguish your profiles easily.
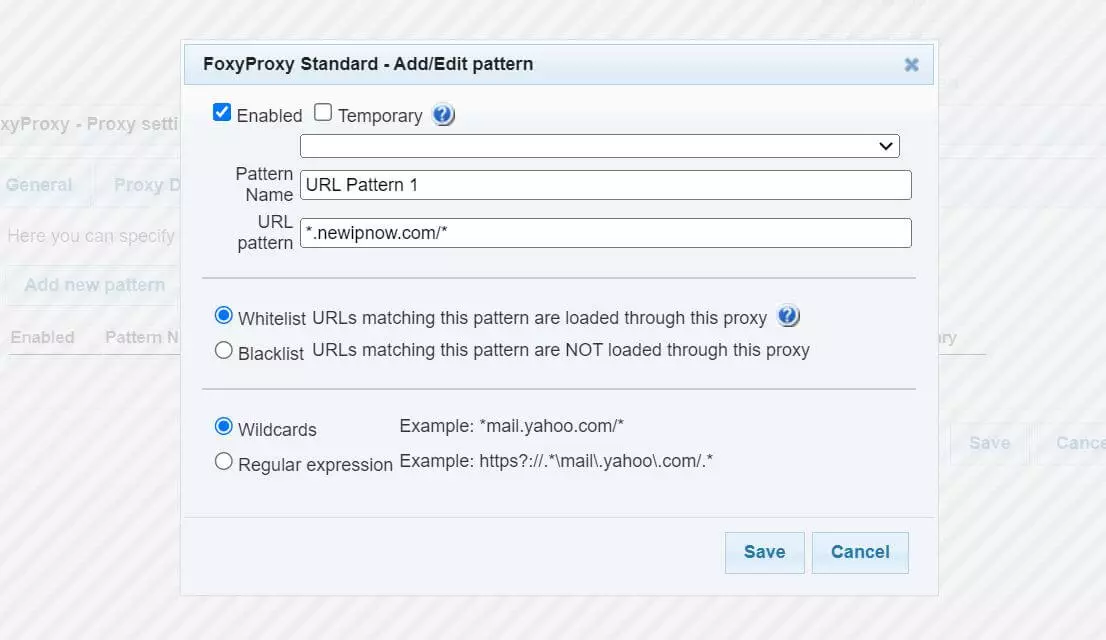
2. Set up your URL Patterns
Go to the “URL Patterns” tab and select “Add new pattern”.
Choose the set up that works best with your targets.
FoxyProxy offers two methods for URL matching: wildcards and regular expressions.
You can check this official comprehensive guide and troubleshooting steps.
How to Use FoxyProxy on Firefox
1. Open FoxyProxy’s Options and Click on the “Add” button.
Click on the FoxyProxy icon in your browser toolbar.
Then, select “Options”.
On the left sidebar, you will find the “Add” button.

2. Configure your Proxies.
Optional Settings can be configured based on your preference. Necessary setup include:
Proxy Type: HTTP or HTTPS.
Proxy IP Address or DNS Name: Type in your Proxy IP from your Proxy List.
Port: These are the numerical values beside after the semi-colon (:) on your proxy list (example: 8800, 8080).
Click “Save”.

3. Ensure that your proxies are activated.
Check that the button beside your proxy is toggled on.
Above this line, ensure that the dropdown is showing the proxy you want to use.

Frequently Asked Questions
IS FOXYPROXY FREE?
Yes. The FoxyProxy browser extension is free to download and use.
My proxies don’t work for my target websites. Can you check?
Yes. We can help troubleshoot issues or get you new working proxies.
About the author

NewIPNow
Private Proxy Provider Since 2009
Imparting knowledge about proxy servers through informative blogs. Writing topics from basic definitions to advanced use cases.
NewIPNow offers high anonymity private proxies
Choose your target websites and location. Get unlimited bandwidth and more features for $0.88/proxy.
